

Integrations is the page in your organization's settings where you connect the outside accounts Vimonto Deploy works with: cloud providers to create servers, DNS providers to point domains, Git hosts to deploy from, and S3-compatible storage for database backups. Open it under Settings → Integrations.
One login is used for everything it can do. A Hetzner Cloud, DigitalOcean, Vultr or Akamai token, an AWS access key or a Google Cloud service account key creates servers and manages the DNS of the domains in that account, so a domain you add to a site can point to its server by itself. Only backup storage asks for keys of its own, because S3 uses separate access keys.
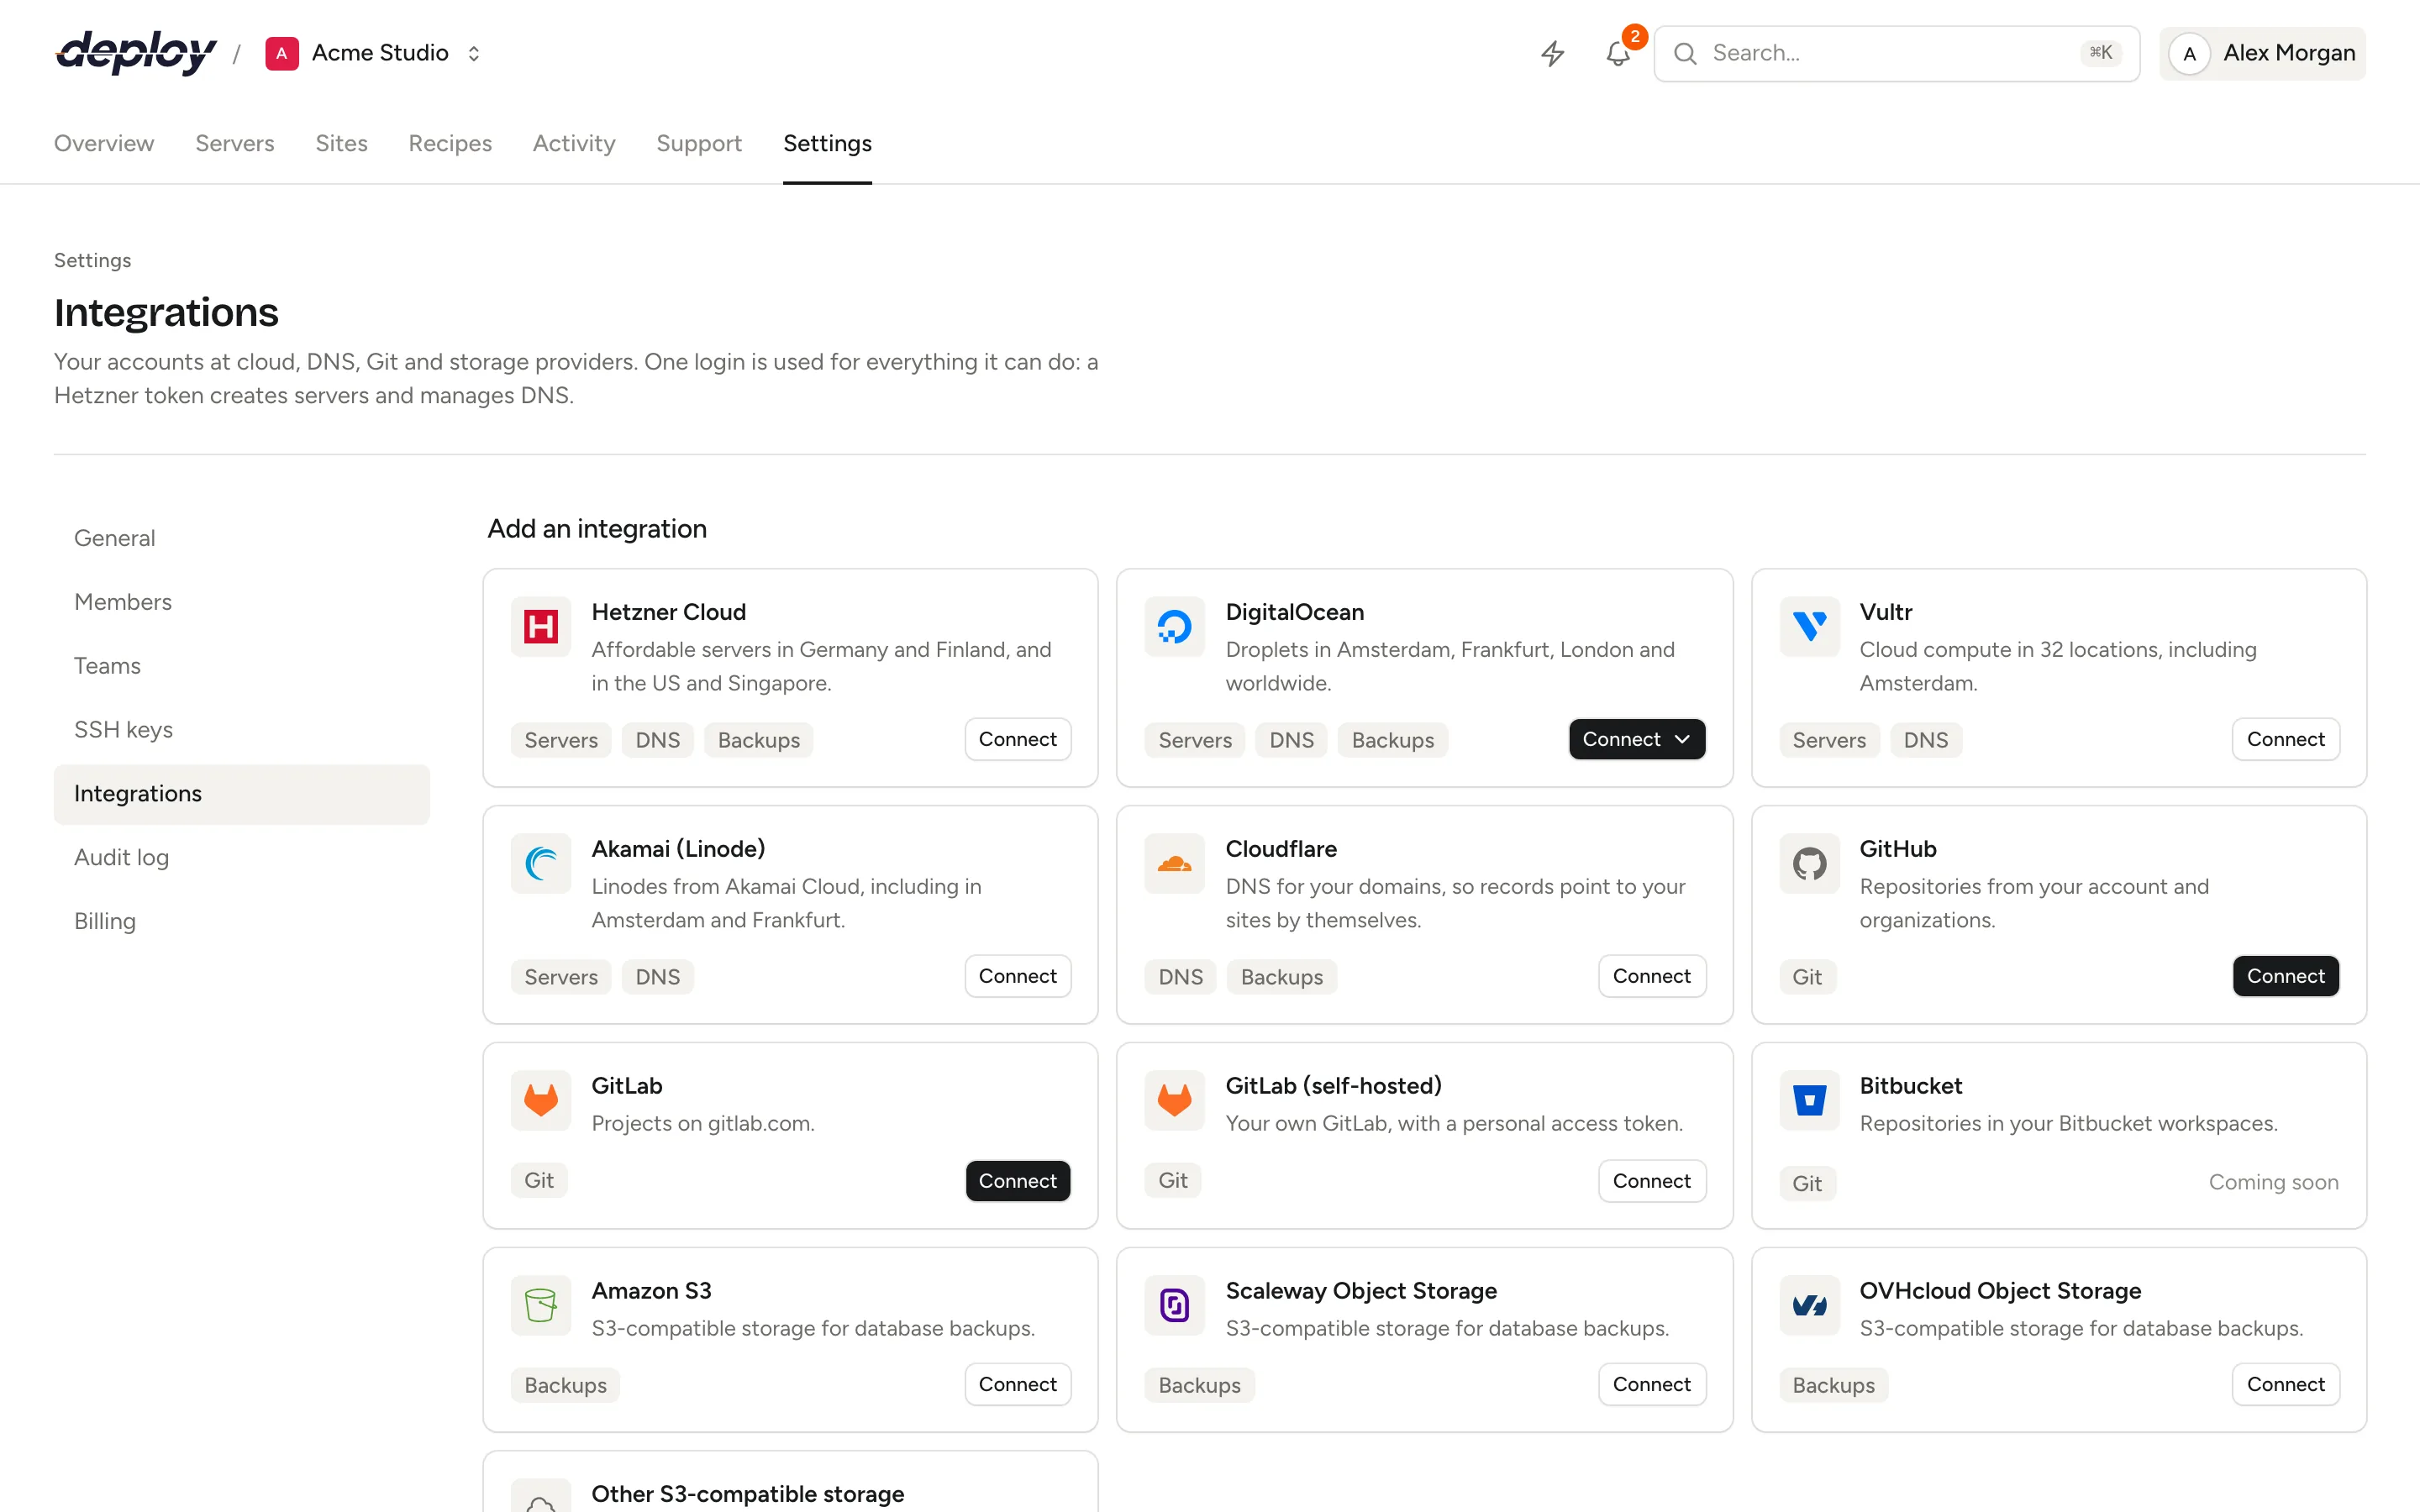
What is on the page?
- Add an integration: a catalog of everything you can connect. Each card shows what one login there covers, as badges: Servers, DNS, Backups or Git, and a button to connect it. Only members who may manage integrations see the catalog.
- Cloud and DNS: your connected cloud and DNS accounts. See cloud and DNS accounts.
- Git: your GitHub, GitLab and Bitbucket accounts. See Git accounts.
- Backup storage: the S3-compatible buckets for database backups. See backup storage.
The older settings pages for server providers, source control and storage now open the matching section of Integrations, so bookmarks keep working.
What does one login cover?
| Account | Servers | DNS | Backups | How you connect |
|---|---|---|---|---|
| Hetzner Cloud | Yes | Yes | Hetzner Object Storage, with its own S3 keys | API token |
| DigitalOcean | Yes | Yes | DigitalOcean Spaces, with its own S3 keys | API token, or OAuth |
| Vultr | Yes | Yes | No | API key |
| Akamai (Linode) | Yes | Yes | No | API token, or OAuth |
| Amazon Web Services | Yes | Yes (Route 53) | Amazon S3, with its own S3 keys | Access key |
| Google Cloud | Yes | Yes (Cloud DNS) | No | Service account key (JSON) |
| Cloudflare | No | Yes | Cloudflare R2, with its own S3 keys | API token |
| GitHub, GitLab, Bitbucket | No | No | No | OAuth (self-hosted GitLab: access token) |
| Amazon S3, Scaleway, OVHcloud, other S3 storage | No | No | Yes | Access keys |
OAuth is offered once a platform administrator has set it up; until then you connect with a token.
Who can manage integrations?
Every member of the organization sees what is connected. Connecting, testing, changing and disconnecting accounts needs the Owner or Administrator role; see members and roles. Changes are recorded in the audit log, without tokens or keys.
Connect an account
- Open Settings → Integrations.
- Find the account under Add an integration and choose Connect. Where OAuth is available, Connect signs you in at the provider and Use an API token opens the token form instead.
- Follow the steps in the window. For a token, Vimonto Deploy checks it against the provider before it saves anything.
A Git host shows Set up to administrators and Coming soon to everyone else until its OAuth app is registered.
Use a connected account for DNS
When you connect a cloud or DNS account, Vimonto Deploy fetches the domains (DNS zones) it manages. Each account card on Cloud and DNS then shows, next to DNS, how many domains it manages and the first few names. When you later add a domain that is in one of those zones to a site, Vimonto Deploy offers to create the DNS records for you, shows exactly what changes, and requests HTTPS once the records resolve. See domains and SSL.
- Refresh domains in the account's menu fetches the list again. You rarely need it: while you type a domain for a site, Vimonto Deploy fetches the lists live, so a domain you just added at the provider is found.
- A domain that none of your accounts has yet can be added to one of them from the domain dialog (Add the domain to a DNS provider); you then set the provider's nameservers at your registrar. At Cloudflare that needs Zone → Zone → Edit and a token that reaches one account.
- Vimonto Deploy remembers the records it makes and removes exactly those when you remove a domain or delete a site. It never overwrites a record it did not make that points elsewhere, except when you confirm the change while adding a domain.
- No DNS access with this login. means the token cannot read DNS. The reason is shown next to it, for example missing permissions. Servers can still be created with it; give the token the DNS permissions (see below) or connect the DNS provider separately.
Connect Cloudflare for DNS
Cloudflare manages DNS only: it does not host servers here. Choose Connect on the Cloudflare card and paste an API token:
- Open My Profile → API Tokens in the Cloudflare dashboard and choose Create Token.
- Start from the Edit zone DNS template, and add Zone → Zone → Read.
- Choose the zones (all, or the ones you use) and copy the token.
The token then needs Zone → Zone → Read and Zone → DNS → Edit. Records Vimonto Deploy makes at Cloudflare are DNS only (not proxied), so HTTPS certificates and visitor addresses work.
Add backup storage to an account
Hetzner, DigitalOcean and Cloudflare also have S3-compatible storage. On such an account's card, Backups shows the linked bucket, or Add backup storage when there is none. S3 needs its own access keys, so that opens the storage form for the account's storage (Hetzner Object Storage, DigitalOcean Spaces or Cloudflare R2), and the bucket you add then belongs to that account. Amazon S3, Scaleway, OVHcloud and other S3-compatible storage are in the catalog as their own cards. See backup storage.
Frequently asked questions
Do I need a DNS integration?
No. Without one, you create the DNS records at your DNS provider yourself; the Set up dialog of a domain lists them. A DNS integration only saves you that step and requests HTTPS for you.
My domains are at Cloudflare, but my servers at Hetzner. Does that work?
Yes. Connect both: Hetzner for the servers, Cloudflare for the DNS. Vimonto Deploy uses whichever account manages the domain's zone.
Why does my Akamai account show no DNS access?
Its token was made without the Domains permission. Create a token with read and write for Linodes, IPs and Domains, and paste it with Change name or token; or, for an OAuth connection, choose Reconnect.